General Settings
In Live Score you can customize various properties and settings.
The General Settings area covers adjustment possibilities across all sports in Live Score.
It can be found in the Main Window Menu Edit > Settings.
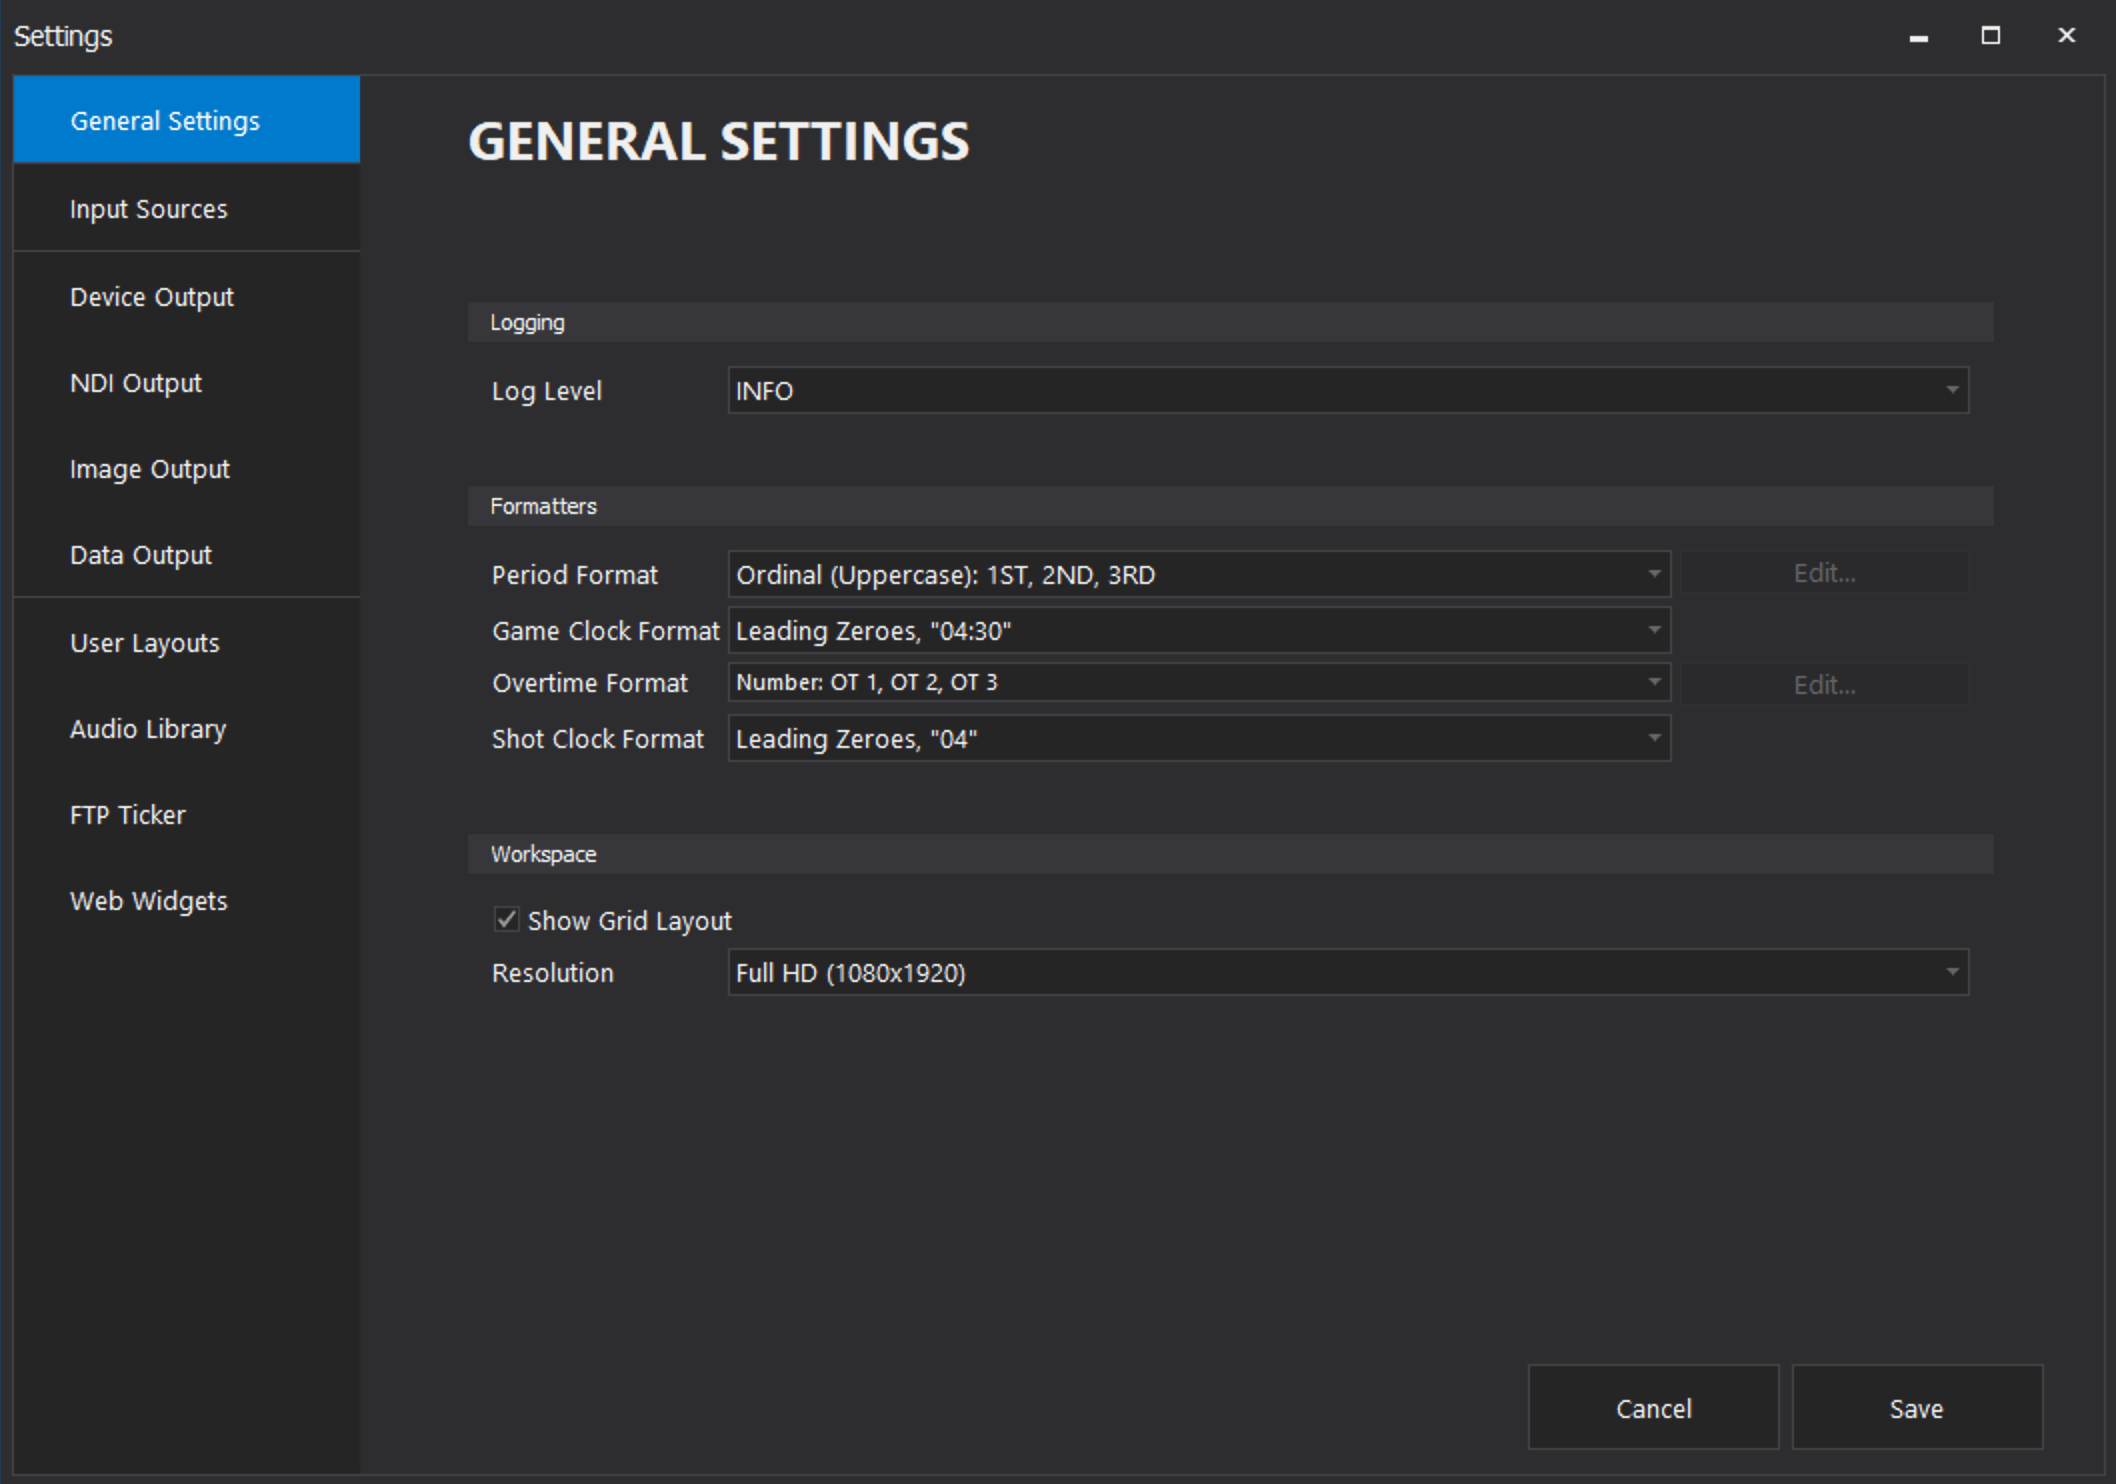
Log Level
The Log Level helps you (or us) to analyze specific problems and improve the overall support.
The default setting is INFO which means, only necessary log entries are saved in the logs within the log directory.
If you face any problems, you can set the level DEBUG to get even more data, that we can then use for debugging any problems. The lower the level is the more file access will happen which could decrease the performance. In that case you can just add it to something like ERROR to only write logs if problems occur.
Formatters
Formatters help you to modify the way how certain data is being formatted and displayed in your scoreboard.
Different types contain different predefined formatters.
So you can automatically decide if you want to show periods like "1ST" or even "1st".
If these options are not enough you can even create your custom formats. This is also perfect for translations or other internationalization specific topics.
Game Clock Format
Specify if your game clocks should be formatted with a leading zero or not.
With this dropdown, you can set if you rather want to show something like "09:56" or "9:56". This only works with sports that support game clocks.
Shot Clock Format
Specify if your shot clocks should be formatted with a leading zero.
Depending on your setting you get a shot clock like "8" or "08".
Please note, that this works only for sports that support shot clocks.
Period Format
This is used for regular periods. You have a handful built in formatters available. You can always create your custom formats too.
Overtime Format
This is exactly like the period formatter but focuses only on overtimes.
This flexibility can be used to display your OTs in a special way.
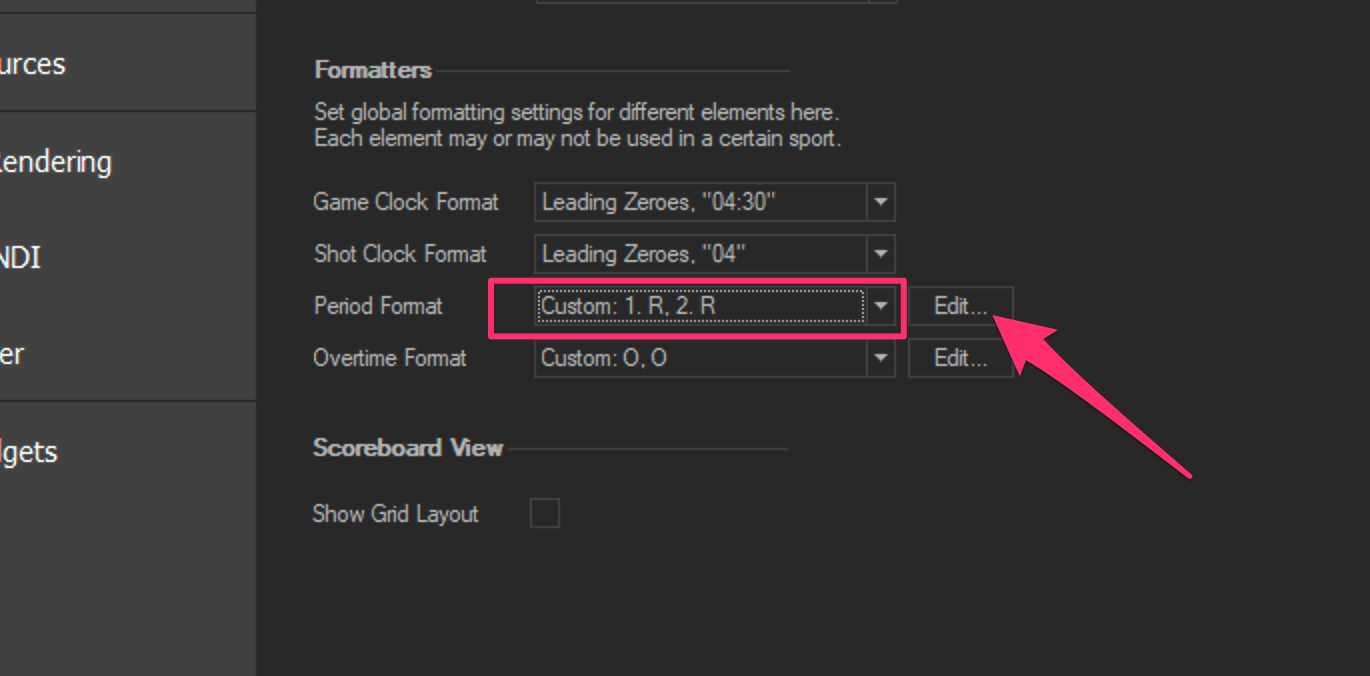
Custom Formats
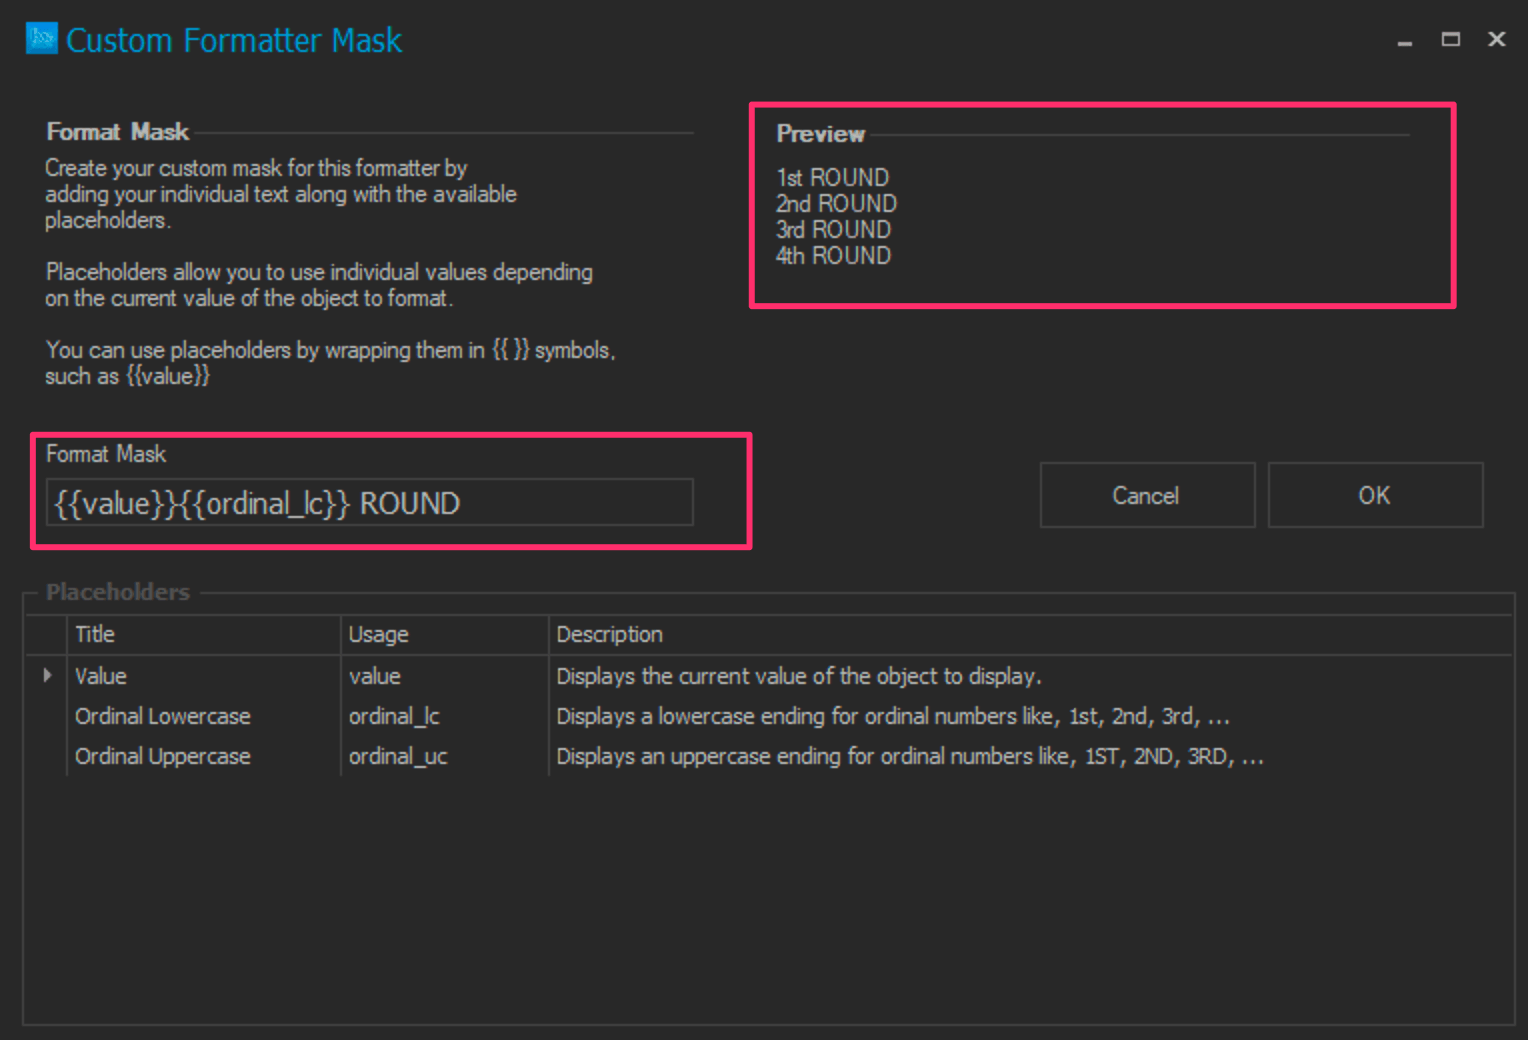
If you want to create a custom format, just select Custom and click on the Edit button next to it.
This will open a new formatter window that allows you to create a custom mask.
Here you can enter a so called "mask". This can either be a static text like "OT", or one of the provided variables to have a dynamic output.
If you are editing a period formatter and want to show the simple period number, just enter this:
If you want to show the danish "halves" for example like "1. Halveg, 2. Halveg", you can just enter:
Your changes should be immediately visible in your layouts.
This will open a new formatter window that allows you to create a custom mask.
Here you can enter a so called "mask". This can either be a static text like "OT", or one of the provided variables to have a dynamic output.
If you are editing a period formatter and want to show the simple period number, just enter this:
. Halveg
Everything you enter will be shown in the preview, so you know exactly what you will end up with.
If you are happy, just click OK and SAVE in the settings window.Your changes should be immediately visible in your layouts.
Grid Layout
Enable or disable the grid layout of the scoreboard area from here.
The grid helps you to position all your scoreboards in the scoreboard area of the main window.
The grid helps you to position all your scoreboards in the scoreboard area of the main window.
After pressing start in the Live Score main window, your grid will disappear from being displayed,
no matter if the feature has been enabled or disabled.
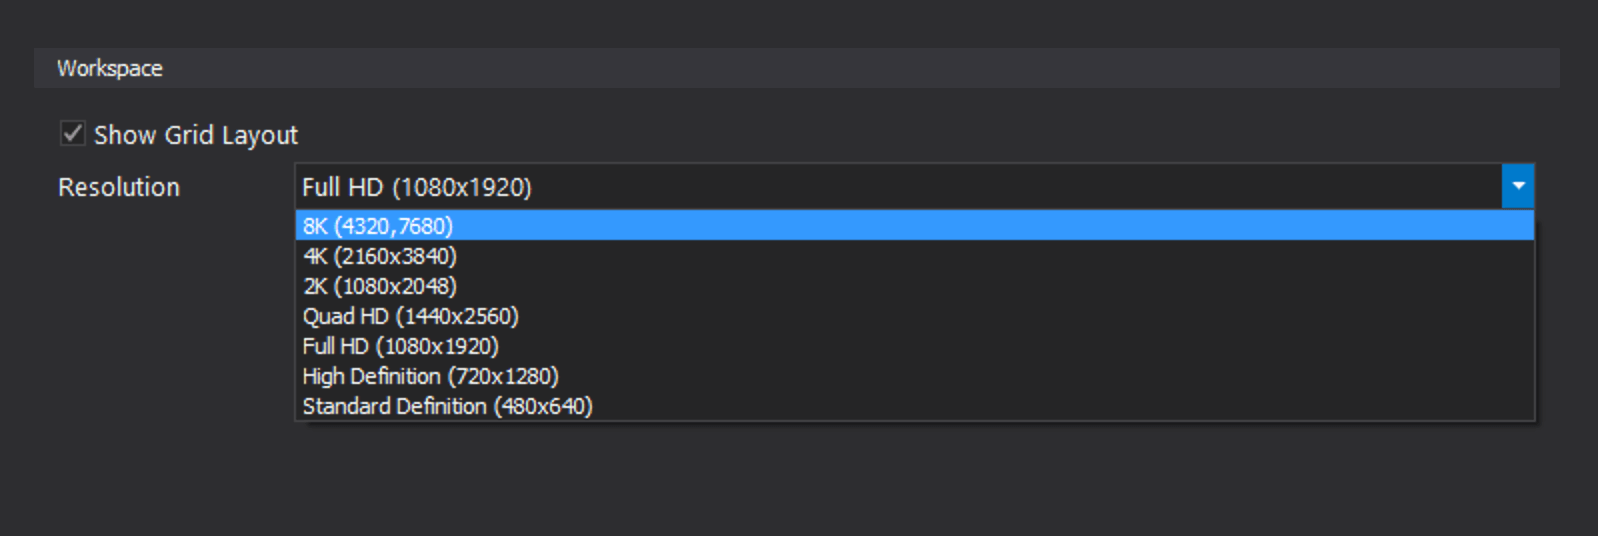
Workspace Resolution
You can set up a custom resolution for your current workspace.
In most cases this is the resolution that you use for your production.
Once you've selected a resolution that fits your needs, you should see that the size of the scoreboard area in the main window changed to this resolution.
If the resolution is larger than your screen, then scroll bars help you to move to different locations in that resolution.
This helps you in cases where you might use features like the External Display module where the score bug is moved to a location that would usually mean that your main window cannot show you the scoreboard aynmore because its "out of view".
You can now simply scroll to the scoreboard in the main window, while the External Display module still has the exact position for your production.
Pro Tip!
If you use the blue start button and also turn on the "Safety Mouse" feature, your main scoreboard area is locked-in to the position that you've configured it to show!
If you use the blue start button and also turn on the "Safety Mouse" feature, your main scoreboard area is locked-in to the position that you've configured it to show!