- vMix
- vMix with NDI
- vMix with Desktop Capture
- vMix with Image Output
- Wirecast
- Wirecast with NDI
- Wirecast with Remote Capture
- Wirecast with Local Capture
- Wirecast MAC OS X
- Open Broadcaster Software
- OBS with Local Capture
- Streamstar
- Streamstar with NDI
- Blackmagic
- ATEM Mini External Display
WATCH THE VIDEO
See how to use vMix and dynamic image output for your broadcasts.
GET YOUR SPORT PACKAGE
Purchase separate controls or the whole Professional Edition
Purchase NowvMix with dynamic Image Output
Last Updated:
In this tutorial, you will learn how to use Live Score with vMix by using
the image output of Live Score.
This is a perfect solution if you run Live Score on the same computer with vMix, and want to save some performance by not creating any video data like with NDI or desktop capturings.
The Image-Output comes with the Professional Edition of Live Score.
This is a perfect solution if you run Live Score on the same computer with vMix, and want to save some performance by not creating any video data like with NDI or desktop capturings.
The Image-Output comes with the Professional Edition of Live Score.
Enable Live Score Image Output
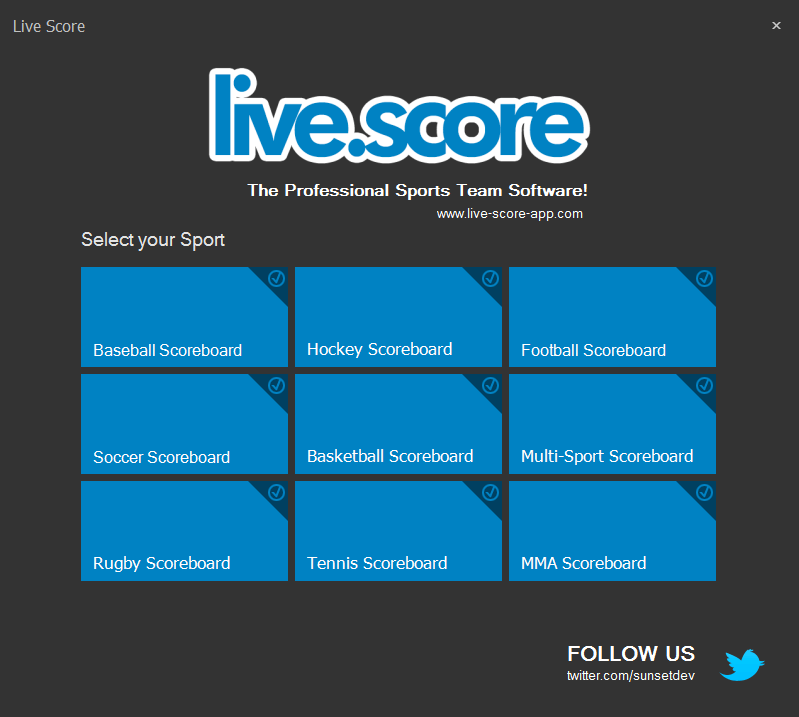
We start by opening Live Score and selecting our sport.
Live Score will start the main application with the sport you have selected.
Now it's time to prepare and enable the image output before we add and align a scoreboard.
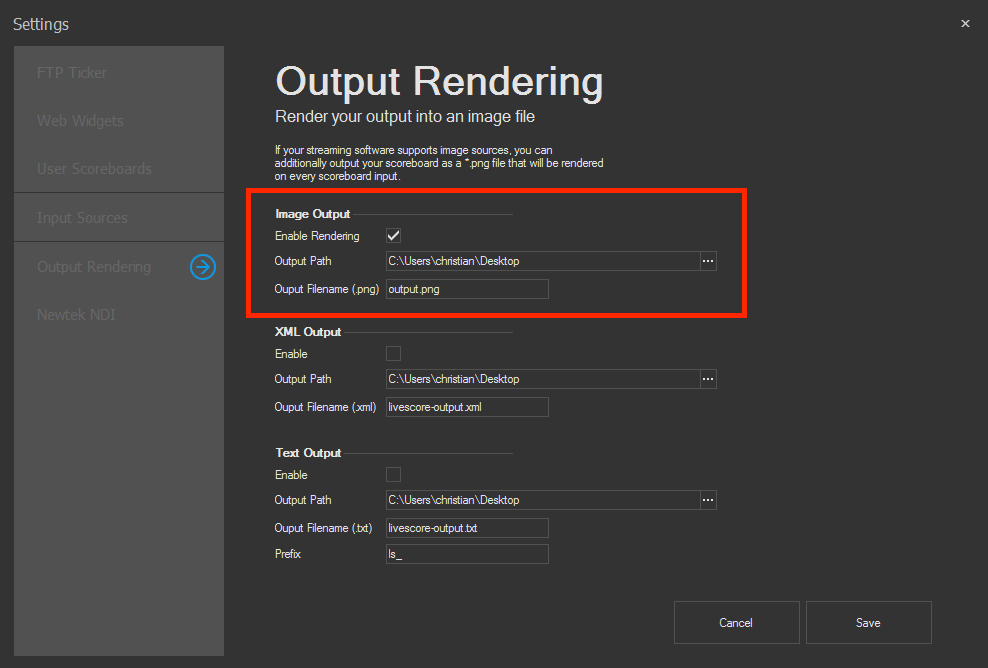
Go to Edit -> Settings and navigate to Output Rendering.
Now enable the image output, set a path and a filename for your image, and click on Save.
Further details about setting up the image output can be found here.
Add a Scoreboard
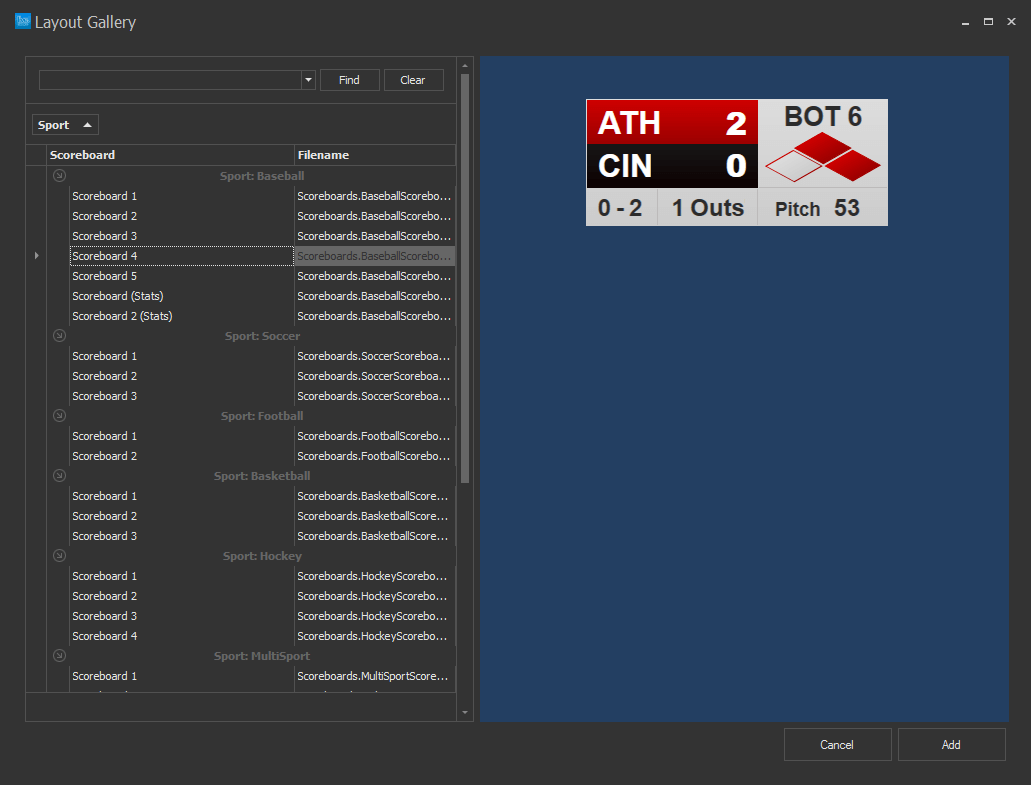
Let's add a new scoreboard by using the + button in the right scoreboard panel of the main
window.
This will open the layout gallery, where you can choose one or more of your available layouts.
After clicking on Add your scoreboard should appear in the center area of Live Score.
You can move it around by dragging the scoreboard with your mouse, zoom it or customize it.
After clicking on Add your scoreboard should appear in the center area of Live Score.
You can move it around by dragging the scoreboard with your mouse, zoom it or customize it.
Start Image Output
We're done in Live Score.
The last thing we need to do is to start the Live Score engine.
Do this by pressing the blue start button in the top right corner of the main window.
If everything worked as expected, Live Score should now save a new png image on every scoreboard data change.
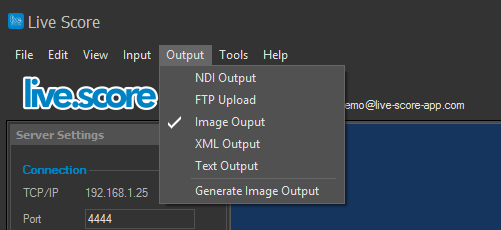
You can optionally trigger an output by using the Generate Image Output from your Output menu. This is recommended when preparing your broadcast to avoid the need of adjusting any scoreboard data.
Start vMix
It's now time to start your vMix application.
You can do this by starting it on the same computer.
vMix should now display an empty project - no input source or anything else.
So let's add a video or camera source.
Click on Add Input and select either one of the appearing options or one of the various input types in More.
You can do this by starting it on the same computer.
vMix should now display an empty project - no input source or anything else.
So let's add a video or camera source.
Click on Add Input and select either one of the appearing options or one of the various input types in More.
Add your Scoreboard image
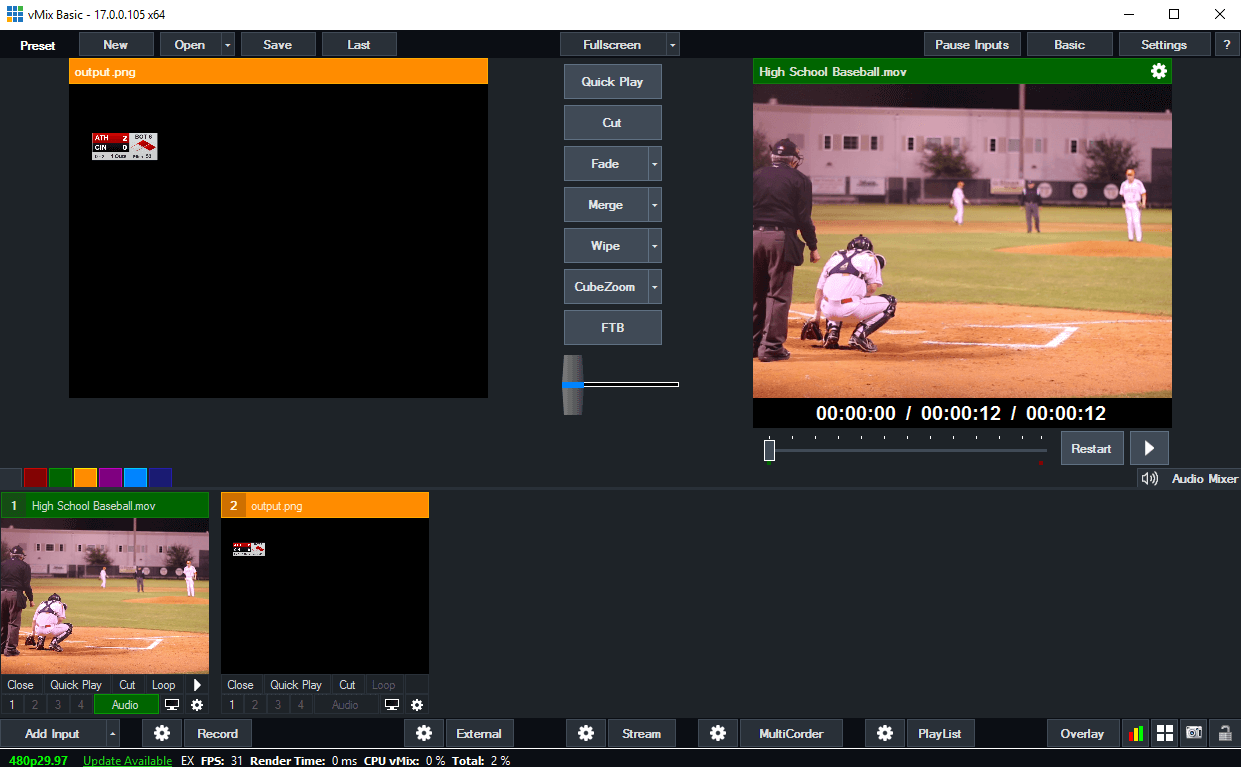
It's finally time to add our scoreboard image to vMix.
Go to the folder where your image is saved from Live Score.
Then just drag and drop it to one of your vMix inputs.
Your Live Score scoreboard is now successfully available in vMix.
Go to the folder where your image is saved from Live Score.
Then just drag and drop it to one of your vMix inputs.
Your Live Score scoreboard is now successfully available in vMix.
Create the overlay
The last thing is to set our scoreboard input as an overlay input.
This is the required setting to have it as a new layer on top of our camera source.
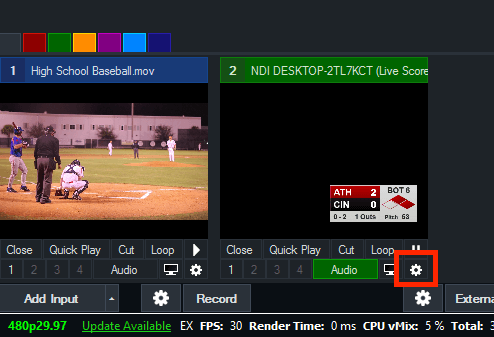
Click on the small gear icon to open the settings dialog for this input.
Now set it as an Overlay and move it to the position that you like most.
And we're done - close the settings and we are ready for the last step.
Bringing it all together
Everything is set up correctly.
It's time to actually bring our new scoreboard layer on top of our camera source.
Because we have set our scoreboard to overlay, you can simply click on it and it will be on top of your camera layer.
If you want to remove it, just click again on your scoreboard input.
When you change your scoreboard data in Live Score, it will automatically export a new version of your image. vMix watches for changes on that file and instantly displays the new version.
That's it, you're ready to go
You can now go on with finer adjustments, like positioning the scoreboard, scaling it,
and proceeding with your usual broadcasting workflow.
Live Score has not been made in cooperation with vMix.
This tutorial only covers the current version of vMix and does not ensure any functionality of vMix.

